King's Kid's Interactive Page I
As Summer winds to a close, we've got two (2) incredible crafts designed for king's kid's, their parents, and their teachers'! Parents, our clubhouse project is straightforward, and your child can decorate it anyway they want! This is a great place to use up all the markers, crayons, paint, paper, glitter, sidewalk chalk (the kids have been using all summer) before replacing them all with fresh supplies for the Fall. Teachers, older children will love building the "Fortress of Faith" which can be assembled very quickly (with prepared pieces), and it comes with a cool game, and a lesson plan. This project is perfect for Sunday School, Vacation Bible School, or as an awesome youth activity anytime! Have fun!
The COOLEST craft projects!
CREATE A CLUBHOUSE
Hey Parent's, here's an absolutely fun way to keep your 5-9 year old king's kid's happily occupied all weekend!
We recommend preparing all the cut pieces in advance, and then let the children have fun building and decorating their own clubhouse.
Let’s turn those cardboard boxes into a whimsical clubhouse that’s fun to build and full of character. Here’s a complete project guide with step-by-step instructions and visuals to spark your creativity.
🏠 DIY Cardboard Clubhouse Project
✂️ Materials Needed
- 3–4 large cardboard boxes (appliance boxes work best)
- Box cutter or craft knife (adult supervision recommended)
- Strong packing tape or duct tape
- Markers, paint, or colored paper for decoration
- Clear plastic or acetate for windows (optional)
- Zip ties (optional for extra stability)
- Ruler and pencil
- Glue stick or hot glue gun
🧱 Step-by-Step Assembly Instructions
1. Design Your Layout
- Choose one box as the main room.
- Use additional boxes to create extensions like a porch, tower, or side room.
- Sketch your layout on paper first to visualize the structure.
2. Cut Out Doors and Windows
- Draw a door on the front panel and cut along the top and one side so it swings open.
- Cut out windows on each side. You can add crossbars or glue clear plastic behind them for a realistic touch.
3. Assemble the Structure
- Stand the boxes upright with flaps open.
- Tape the flap edges together to increase height and stability.
- Use zip ties or tape to connect boxes side-by-side or stack them for a two-story effect.
4. Create the Roof
- Angle two long flaps inward to form a pitched roof.
- Trace and cut the shape onto the side flaps.
- Tape the roof together securely.
- Optional: Cut cardboard tiles and glue colored paper on top for a shingled look.
5. Decorate Your Clubhouse
- Paint the exterior or glue colored paper for siding.
- Add a mailbox, flower boxes, or a nameplate.
- Use leftover cardboard to create furniture, signs, or props.
🖼️ Visual Inspiration
Here are some clubhouse designs and diagrams to guide your build:
- Hey Duggee’s Cardboard Clubhouse Instructions: Includes templates and roof tile ideas.
- 2-Story Cardboard Clubhouse with Ladder and Slide: A more advanced build with multiple levels.
- Cardboard Clubhouse Ideas on Pinterest: Over 900 creative variations to explore.
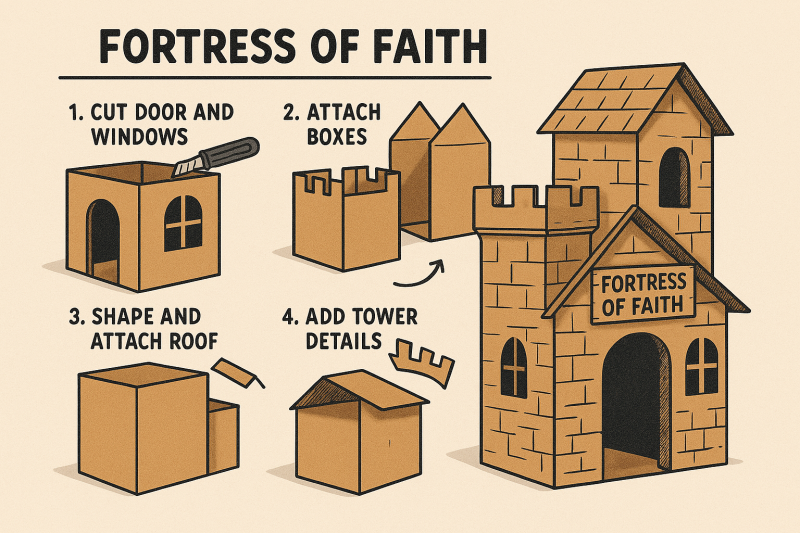
🏗️ Assembly Steps: Building the “Fortress of Faith”
✂️ Materials
- 3–4 large cardboard boxes (refrigerator or appliance size)
- Box cutter or craft knife
- Packing tape or duct tape
- Paint, markers, or colored paper
- Cross-shaped window templates
- Gold paper or foil for crowns
- Scripture scroll printouts (Psalm 18:2, Proverbs 18:10, etc.)
- Optional: LED candles, fabric scraps, plastic gems
🧱 Step-by-Step Instructions
1. Foundation & Layout
- Choose one box as the central tower.
- Use others to create side wings or a prayer alcove.
- Cut flaps to interlock boxes and tape securely.
2. Door of Refuge
- Cut a large arched door labeled “Enter His Safety.”
- Add a flap that opens inward, symbolizing invitation.
3. Windows of Truth
- Cut cross-shaped windows and back them with clear plastic or colored cellophane.
- Label each with a virtue: “Faith,” “Hope,” “Love,” “Courage.”
4. Roof of Protection
- Angle flaps to form a pitched roof.
- Decorate with “shields” made from cardboard and scripture verses.
5. Interior Stations
- Crown Creation Corner: Kids make paper crowns and write one truth about their identity in Christ.
- Scroll Alcove: Hide mini scrolls with verses inside the walls.
- Prayer Pillar: A vertical cardboard tube where kids can drop prayer requests.
📖 Pop-Up Lesson Plan: “The Lord Is My Fortress”
🎯 Theme
Proverbs 18:10 – “The name of the Lord is a strong tower; the righteous run to it and are safe.”
🧒 Target Age
Ages 4–10 (adaptable for younger or older groups)
🕊️ Opening Activity: Run to the Fortress Game
- Kids start across the room. The teacher reads a bible verse, and the correct answer advances one step. The first to arrive wins first arrival, but the process continues until all the children are in the fortress.
- Say together: “The Lord God is our fortress, we run to Him, and He protects us.”

📖 Pop-Up Lesson Plan: “The Lord Is My Fortress”
🎯 Theme
Proverbs 18:10 – “The name of the Lord is a strong tower; the righteous run to it and are safe.”
🧒 Target Age
Ages 4–10 (adaptable for younger or older groups)
🕊️ Opening Activity: Run to the Fortress
- Kids start across the room and run to the cardboard structure.
- Say together: “God is our fortress. We run to Him, and He protects us.”
📚 Scripture Exploration
- Read Psalm 18:2 aloud.
- Ask: What does it mean to be safe in God? What makes a fortress strong?
🎨 Craft Stations
- Crown Station: Kids decorate crowns and write “I am a child of the King.”
- Scroll Station: Kids find hidden scrolls and read verses aloud.
- Shield Station: Decorate cardboard shields with words like “Faith,” “Truth,” “Peace.”
🧠 Discussion Prompts
- What makes you feel safe?
- How can we run to God when we’re scared or unsure?
- What does it mean to trust God like a fortress?
🙏 Closing Prayer
“Lord, thank You for being our strong tower. Help us run to You when we’re afraid, and remind us that You are always with us. Amen."
📚 Scripture Exploration
- Read Psalm 18:2 aloud.
- Ask: What does it mean to be safe in God? What makes a fortress strong?
🎨 Craft Stations
- Crown Station: Kids decorate crowns and write “I am a child of the King.”
- Scroll Station: Kids find hidden scrolls and read verses aloud.
- Shield Station: Decorate cardboard shields with words like “Faith,” “Truth,” “Peace.”
🧠 Discussion Prompts
- What makes you feel safe?
- How can we run to God when we’re scared or unsure?
- What does it mean to trust God like a fortress?
🙏 Closing Prayer
“Lord, thank You for being our strong tower. Help us run to You when we’re afraid, and remind us that You are always with us. Amen.”
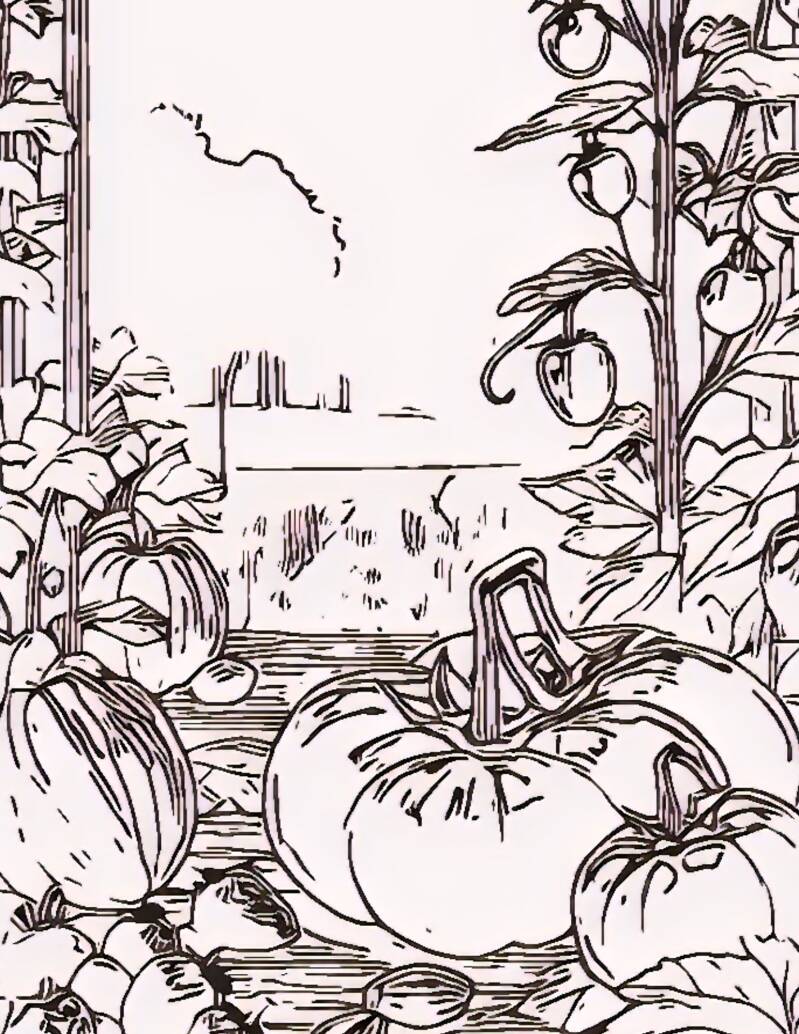
Get help from Mom or Dad to print this page, then color it to show how colorful your garden grows!